
🏠 Home > 🗺️ Recipes > 🍱 Snacks > 🇧🇴 Bolivia Snacks > 🍱 1.Low-Carb Beef Salteñas , 2.Traditional Keto Cuñapés , 3.Crunchy Keto Bolivian Silpancho Bites
🍱 Keto in the Andes: 3 Portable Bolivian Snacks for Your Busy Low-carb Lifestyle
Published by Supakorn | Updated: May 2026
🇧🇴 🍔 Introduction: Bringing the Vibrant Flavors of Bolivia to Your Keto Kitchen
Hey there, fellow food lover! If you ever think that staying in ketosis means eating nothing but plain grilled chicken and raw avocado slices, I am about to change your culinary world forever. Today, we are taking a trip down to South America—specifically to the breathtaking, high-altitude landscapes of Bolivia.
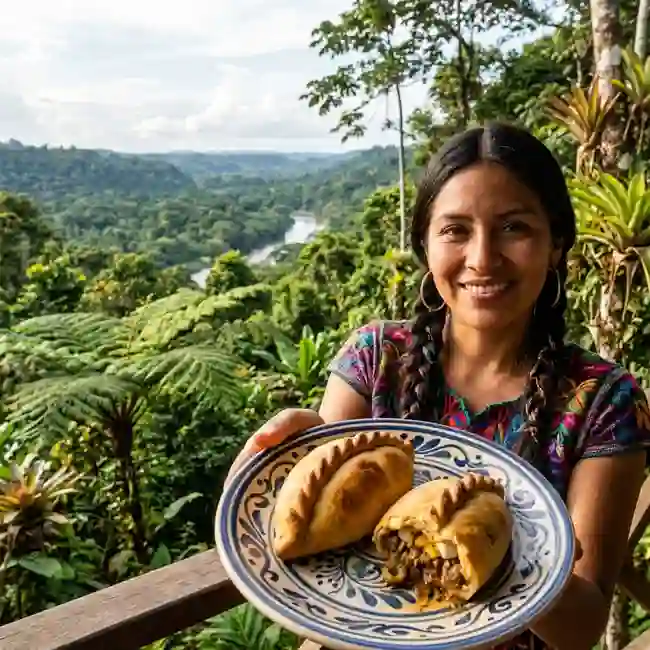
Bolivia is a country of massive contrasts. You have the stunning, snow-capped peaks of the Cordillera Real mountain range, the surreal and endless white horizons of the Salar de Uyuni salt flats, and bustling, colorful street markets in La Paz and Santa Cruz. Travelers from all over the globe flock here not just for the views, but for the unbelievable comfort food. Bolivian street food is legendary. It is warm, deeply savory, rich, and incredibly satisfying. The only catch? Traditional Bolivian snack culture relies heavily on corn, potatoes, cassava, and wheat flour.
But guess what? You do not have to miss out on these rich culinary traditions just because you are keeping things low-carb.
In this ultimate foodie guide, we are transforming three of Bolivia's most iconic, beloved snacks into keto-friendly masterpieces. They are packed with the exact same authentic herbs, textures, and spices, but without the insulin spike. Even better, we have engineered these recipes specifically for your busy, modern life. Every single one of these snacks is perfectly portable, structurally sound, and ready for your on-the-go routine.
Here is a quick look at the three delicious recipes we will cover today:
🥩 • Recipe 1: Low-Carb Beef Salteñas (The ultimate juicy, savory baked pastry)
🥮 • Recipe 2: Keto Cuñapés (Cheesy, pillowy, gluten-free bread bites)
🍢 • Recipe 3: Crunchy Keto Bolivian Silpancho Bites (A genius, portable twist on a classic beef-and-egg powerhouse)
Grab your apron, fire up your oven, and let us dive straight into the vibrant world of low-carb Bolivian cooking!
🥟 Recipe 1: Low-Carb Beef Salteñas
🇧🇴 About this Recipe
If you ask anyone from Bolivia what their absolute favorite morning snack is, the answer will almost always be the Salteña. Traditionally, these are football-shaped baked pastries filled with a sweet and savory, incredibly juicy meat stew. The hallmark of a true Salteña is its liquid center. It is almost like a South American soup dumpling! Eating one on the street without spilling a drop on your shirt is a true badge of honor.
For our keto version, we are replacing the high-carb wheat flour with a spectacular mozzarella and almond flour pastry dough. To mimic that signature, juicy filling without using sugar or starchy thickeners, we use rich bone broth and a touch of unflavored gelatin. This keeps the interior delightfully saucy when baked hot, giving you that authentic, explosive flavor experience on the go.
🧂 Ingredients & Measurements
For the Keto Pastry Crust:
• Almond flour (super-fine): 2 cups
• Shredded mozzarella cheese (low-moisture): 2 cups
• Cream cheese: 2 tablespoons
• Large egg: 1 piece
• Xanthan gum: 1/2 teaspoon
• Achiote powder (for that beautiful orange hue): 1 teaspoon
For the Savory Beef Filling:
• Ground beef (80/20 fat ratio): 1 pound
• Finely chopped red onion: 1/2 cup
• Finely chopped green bell pepper: 1/4 cup
• Beef bone broth (rich and gelatinous): 1/2 cup
• Unflavored powdered gelatin: 1 teaspoon
• Ground cumin: 1 teaspoon
• Smoked paprika: 1 teaspoon
• Oregano: 1/2 teaspoon
• Salt: 1 teaspoon
• Black pepper: 1/2 teaspoon
• Hard-boiled eggs (chopped into small pieces): 2 pieces
• Sliced black olives: 6 pieces
👩🍳 Step-by-Step Instructions
1.Prep the Filling Ahead: Heat a skillet over medium heat and brown the ground beef, chopped red onion, and green bell pepper until the meat is fully cooked. Drain any excess grease if it looks too swimmingly wet.
2.Season and Gel: Stir in the cumin, smoked paprika, oregano, salt, and black pepper. In a small bowl, sprinkle the gelatin powder over the beef bone broth and let it bloom for 2 minutes. Pour the broth into the warm beef mixture and stir until fully dissolved.
3.Chill the Filling: Remove the pan from the heat. Let the meat mixture cool completely, then cover it and pop it into the fridge for at least 2 hours (or overnight). The filling must gelatinize into a solid paste so it is easy to wrap inside the dough!
4.Make the Pastry Crust: In a microwave-safe bowl, combine the shredded mozzarella and cream cheese. Microwave in 30-second bursts until fully melted and pliable.
5.Mix the Dough: Stir the almond flour, egg, xanthan gum, and achiote powder into the melted cheese. Knead thoroughly with your hands until a smooth, uniform, orange dough forms. If it gets too stiff, microwave for another 10 seconds.
6.Roll and Shape: Roll the dough out between two sheets of parchment paper until it is about 1/4-inch thick. Use a large round cookie cutter or a bowl to cut out circles roughly 5 inches in diameter.
7.Assemble: Take your chilled, solidified beef filling out of the fridge. Place 2 tablespoons of the beef mixture into the center of each dough circle. Top with a piece of hard-boiled egg and an olive slice.
8.Seal and Crimp: Fold the dough over the filling to create a half-moon shape. Press the edges together tightly. To give it the traditional Salteña look, create a braided seam (called a repulgue) along the top ridge.
9.Bake: Place the assembled pastries upright on a baking sheet lined with parchment paper. Bake at 400 degrees Fahrenheit ( 204 degrees Celsius ) for 15 to 18 minutes until the crust turns a gorgeous, deep golden brown. Let them cool for 10 minutes before eating so the juices set up beautifully!
💡 Tips & Mistakes to Avoid
• Do not skip the filling chill time: If your filling is warm or at room temperature when you try to wrap it, the juices will run everywhere, and you will not be able to seal the dough properly.
• Avoid over-kneading cold dough: If the cheese dough gets cold, it loses its elasticity and tears easily. Keep it warm, or quickly re-warm it if it becomes tough to work with.
• The leaking disaster: Make sure your braided edge is completely airtight. If there is even a tiny pinhole, that delicious, savory broth will escape all over your baking sheet.
• Use the right cheese: Always use low-moisture, part-skim shredded mozzarella. Fresh mozzarella contains far too much water and will make your pastry dough completely mushy.
❓ FAQ
Q1.Can I freeze these for meal prep?
Yes! You can freeze them beautifully after they are fully baked and cooled. Just wrap them tightly in foil. Pop them in the oven or air fryer at 350 degrees Fahrenheit / 176 degrees Celsius for 10 minutes to reheat on busy mornings.
Q2.Why is my dough breaking apart?
This usually happens if you omit the xanthan gum or if the cheese cooled down too fast. Xanthan gum mimics the gluten structure, which is vital for holding the heavy, juicy filling together.
📝 Summary
Low-Carb Beef Salteñas are the king of savory snacks. They combine a flaky, golden almond-cheese crust with a bursting, flavorful beef interior. By utilizing the power of natural gelatin, we keep the traditional juicy texture perfectly intact without adding any unwanted carbs.

🧀 Recipe 2: Traditional Keto Cuñapés
🇧🇴 About this Recipe
If you love cheese, you are about to fall head over heels for the Cuñapé. Originating from the tropical eastern lowlands of Bolivia, these are magical, bite-sized cheese breads that are crisp on the outside and remarkably soft, chewy, and airy on the inside. They are typically enjoyed in the afternoon alongside a hot drink.
The traditional recipe is naturally gluten-free because it uses cassava starch (yuca flour). However, cassava starch is loaded with fast-digesting carbohydrates, making it a no-go for keto. To bypass this, our clever low-carb adaptation uses a precise blend of super-fine almond flour and modern, high-fiber starches or protein powders. This blend perfectly recreates that iconic, addictive chewiness while keeping your blood sugar entirely stable.
🧂 Ingredients & Measurements
• Finely shredded Queso Fresco or mild white cheddar cheese: 2 cups
• Super-fine almond flour: 1 cup
• Unflavored whey protein isolate: 1/4 cup
• Large eggs (beaten): 2 pieces
• Baking powder: 1 teaspoon
• Heavy cream: 2 tablespoons
• Salt (adjust based on how salty your cheese is): 1/2 teaspoon
👩🍳 Step-by-Step Instructions
1.Mix the Dry Ingredients: In a large bowl, whisk together the super-fine almond flour, unflavored whey protein isolate, baking powder, and salt.
2.Incorporate the Cheese: Toss the finely shredded cheese into the dry mixture. Use your fingers to rub the cheese into the flour, ensuring it is completely broken up and evenly distributed.
3.Add the Liquids: Pour in the beaten eggs and heavy cream. Use a sturdy spatula or your hands to mix everything together. Knead the mixture directly in the bowl for about 1 to 2 minutes until it transforms into a thick, uniform, and slightly sticky dough.
4.Rest the Dough: Let the dough sit undisturbed on your counter for 5 minutes. This allows the almond flour and protein powder to absorb the moisture thoroughly.
5.Roll into Balls: Portion the dough out and roll it between your palms into smooth, round balls about the size of a golf ball. You should get roughly 10 to 12 balls.
6.The Signature Thumbprint: Press your thumb gently into the bottom of each cheese ball to create a slight indentation. This traditional trick ensures that the centers bake evenly and puff up beautifully.
7.Bake to Perfection: Line a baking sheet with parchment paper and space the dough balls about 2 inches apart. Bake at 375 degrees Fahrenheit ( 190 degrees Celsius ) 12 to 15 minutes, or until the tops turn an irresistible, mottled golden-brown color. Serve them warm for the absolute best texture!
💡 Tips & Mistakes to Avoid
• Grate your own cheese: Avoid pre-packaged shredded cheeses if possible. They are often coated in potato starch or cellulose to prevent sticking, which adds sneaky carbs and stops the dough from melting together uniformly.
• Do not substitute the whey protein: The whey protein isolate is the secret weapon that replaces the stretchy, airy properties of traditional cassava starch. If you substitute it with more almond flour, your cuñapés will turn out dense and crumbly rather than light and chewy.
• Keep an eye on the oven: Because cheese is the primary ingredient, the line between perfectly golden and burnt is incredibly thin. Check them at the 12-minute mark!
❓ FAQ
Q1.What kind of cheese works best if I can't find Queso Fresco?
A mix of mild white cheddar, Monterey Jack, or even low-moisture mozzarella works brilliantly. Just avoid intensely sharp cheeses that release too much oil when heated.
Q2.Can these be eaten cold on the go?
Absolutely! They remain deliciously soft and savory at room temperature, making them an incredible, mess-free snack to pack in your daily lunchbox.
📝 Summary
Keto Cuñapés are the ultimate portable cheese fix. They deliver a satisfyingly crisp exterior and a beautifully soft, airy center. Thanks to the power of whey protein isolate and authentic cheese ratios, you can enjoy these legendary street food bites anytime, completely carb-free.

🥩 Recipe 3: Crunchy Keto Bolivian Silpancho Bites
🇧🇴 About this Recipe
Silpancho is a legendary, comforting dish hailing from the valley city of Cochabamba, known as the culinary capital of Bolivia. The classic presentation features a massive, incredibly thin, pounded beef schnitzel that blankets a mountain of rice and potatoes. It is then topped with a perfectly fried egg and a vibrant, spicy tomato-and-onion relish called sarsa.
Obviously, a giant plate of rice, potatoes, and breaded meat is an absolute carb overload. But we are turning this gourmet masterpiece into an ingenious, finger-food-friendly snack! We take lean ground beef spiced with authentic Bolivian herbs, wrap it into bite-sized cutlets breaded with savory crushed pork rinds, and pan-fry them to crispy perfection. Top each crunchy bite with a tiny slice of hard-boiled egg and a dollop of fresh relish, and you have all the spectacular, complex flavors of Silpancho completely optimized for a handheld, on-the-go snack.
🧂 Ingredients & Measurements
For the Crispy Meat Bites:
• Lean ground beef (90/10 lean ratio): 1 pound
• Crushed pork rinds (panko style): 1 cup
• Garlic powder: 1 teaspoon
• Ground cumin (the backbone of Bolivian seasoning): 1 teaspoon
• Large egg (for binding): 1 piece
• Salt: 1 teaspoon
• Black pepper: 1/2 teaspoon
• Olive oil or avocado oil (for frying): 3 tablespoons
For the Portable Toppings:
• Hard-boiled eggs (sliced into neat rounds): 3 pieces
• Finely diced Roma tomato: 1/2 cup
• Finely diced red onion: 1/4 cup
• Finely chopped fresh cilantro: 2 tablespoons
• Fresh lime juice: 1 tablespoon
• Olive oil: 1 teaspoon
👩🍳 Step-by-Step Instructions
1.Mix the Meat Base: In a large mixing bowl, combine the lean ground beef, garlic powder, ground cumin, salt, black pepper, and the raw egg. Mix with your hands until the spices are fully incorporated into the beef.
2.Shape into Mini Cutlets: Roll the seasoned beef into small balls, then press them down flat between your hands to create mini, thin patties (about 2 inches wide). You want them thin so they cook quickly and get beautifully crispy.
3.Bread with Pork Rinds: Pour your crushed pork rinds into a shallow dish. Press each mini beef patty firmly into the pork rinds, ensuring both sides are completely coated in the crunchy breading.
4.Pan-Fry to Golden Perfection: Heat the olive oil or avocado oil in a large skillet over medium-high heat. Fry the breaded meat bites for about 3 minutes per side. They should develop a deep, crunchy brown crust. Remove and let them drain on paper towels.
5.Mix the Sarsa Relish: In a separate small bowl, toss together the diced tomato, red onion, cilantro, lime juice, and a tiny splash of olive oil with a pinch of salt.
6.Assemble the Bites: To make them portable, place a slice of hard-boiled egg squarely on top of each crispy beef bite. Secure the egg in place with a toothpick if you are packing them for travel. Just before serving, spoon a small amount of the fresh tomato-onion relish right on top!
💡 Tips & Mistakes to Avoid
• Crush the pork rinds finely: If your pork rind pieces are too large and chunky, they will fall off the meat during frying. Use a food processor to grind them down to a neat, breadcrumb-like consistency.
• Do not crowd your frying pan: If you drop all the meat bites into the skillet at once, the temperature of the oil will plummet. They will end up absorbing grease and turning soggy instead of crisping up beautifully. Fry them in comfortable batches!
• Keep the relish separate for travel: If you are packing these for a road trip or a long day at the office, store the fresh tomato-onion relish in a separate little container. Spoon it onto the crispy bites right before you eat them so the crust stays spectacularly crunchy.
❓ FAQ
Q1.Can I make these in an air fryer?
Yes, absolutely! Spritz the breaded bites generously with oil spray and air fry them at 400 degrees Fahrenheit or 204 degrees Celsiusfor about 8 to 10 minutes, flipping halfway through.
Q2.Can I use ground turkey instead of beef?
While authentic Silpancho is strictly beef-based, ground turkey or chicken works beautifully as a lighter alternative. Just ensure you don't skimp on the cumin to keep that classic flavor profile alive.
📝 Summary
Crunchy Keto Bolivian Silpancho Bites compress an entire iconic South American meal into a single, high-protein, incredibly flavorful snack. The clever combination of cumin-infused beef, a crispy pork rind crust, and bright, zesty toppings gives you a wonderful gourmet experience you can enjoy anywhere.
🌟 Final Thoughts: Embrace the Low-Carb Andean Feast!
There you have it, my friends! Three spectacular, authentic, and utterly delicious Bolivian snacks adapted seamlessly for your healthy, low-carb lifestyle. As you can see, breaking away from standard keto boredom is incredibly easy when you look to the rich culinary traditions of the world.
These recipes prove that with a little bit of creativity and the right ingredient swaps, you can absolutely enjoy gourmet street food textures—from the juicy explosion of a fresh Salteña to the comforting chew of a cheesy Cuñapé—all while keeping your fitness goals completely on track. None of these snacks require crazy culinary degrees to pull off. They are straightforward, straightforward to prepare, and pack beautifully into meal prep containers for your busiest days on the go.
I highly encourage you to try making these recipes one by one. Start this weekend with the cheesy Cuñapés, then move on to mastering the legendary beef Salteñas. Once you give them a try, come back and share your kitchen wins with me! Which one turned out to be your absolute favorite? Happy cooking, stay healthy, and enjoy every single bite of your low-carb Bolivian adventure!
| 🇧🇴 🍱 < Back |