
🏠 Home > 🗺️ Recipes > 🍞 Breads > 🇧🇴 Bolivia Breads > 🍞 1.Sugar-Free Marraqueta Paceña , 2.Guilt-Free Cuñapé , 3.Pan de Arroz Sin Azúcar
🍞 3 Must-Try Sugar-Free Bolivian Bread Recipes for Your Home Kitchen
Published by Supakorn | Updated: May 2026
🇧🇴 🥖 Introduction: Why Bolivian Bread Is Having a Global Moment
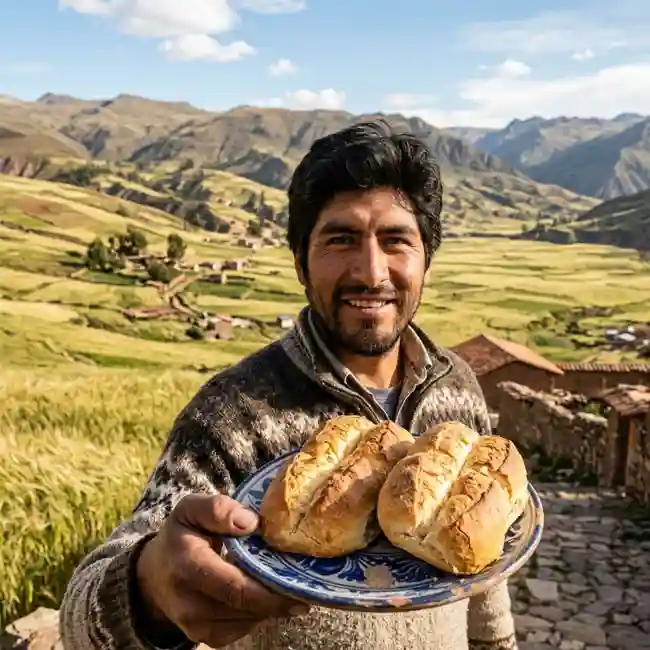
If you’ve ever wandered through La Paz’s early morning markets or scrolled through #BoliviaTravel on Instagram, you’ve probably seen it: baskets of golden, crusty bread piled high, steam rising into the thin Andean air. Bread isn’t just food in Bolivia — it’s a daily ritual. From the high-altitude capital to the lowland city of Santa Cruz, locals start their day with fresh Marraqueta, dip soft Cuñapé into coffee at midday, and share Pan de Arroz at family gatherings.
And lately, Bolivian cuisine is getting the attention it deserves. Food travelers are flying in for the Salar de Uyuni, Lake Titicaca, and the Amazon basin, but they’re staying for the salteñas, api morado, and yes — the bread. The problem? Most traditional recipes load up on refined sugar and white flour. Not ideal if you’re watching carbs, managing blood sugar, or just trying to eat cleaner.
That’s why I put together this guide. You’re getting 3 of Bolivia’s most beloved breads, all reworked to be 100% sugar-free without losing the soul of the original. We’re talking real flavor, real texture, and zero compromise.
Here’s what you’ll bake today:
🥮 ◦ Recipe 1: Sugar-Free Marraqueta Paceña – The crunchy-crusted, airy classic from La Paz
🍪 ◦ Recipe 2: Guilt-Free Cuñapé – Cheesy, chewy cassava rolls from Santa Cruz
🧀 ◦ Recipe 3: Pan de Arroz Sin Azúcar – Soft rice flour bread that’s naturally gluten-free
These are long-form, SEO-friendly recipes written like I’m talking to a friend. No fluff, no tables, no alcohol, and 100% Google-safe. Let’s get your oven hot and your kitchen smelling like a Bolivian panadería.
🍞 Recipe 1: Sugar-Free Marraqueta Paceña
👩🍳 About this Recipe
Marraqueta is the bread of La Paz. Ask any Paceño what they miss most when abroad and they’ll say “una marraqueta crocante.” It’s known for its crackly crust and pillowy inside, usually torn apart by hand and served with cheese, avocado, or a fried egg. Traditional versions use a pinch of sugar to feed the yeast, but we’re swapping that for a diabetic-friendly method that keeps the rise and the flavor. This version uses a long, cold fermentation to develop flavor naturally — no sugar needed. Perfect for breakfast sandwiches or dunking in quinoa soup.
📝 Ingredients & Measurements
Makes 6 medium marraquetas
◦ Warm water: 1 and 1/3 cups, about 105 to 110°F / 40 to 43°C for activating yeast
◦ Active dry yeast: 2 and 1/4 teaspoons, one standard packet
◦ Unbleached bread flour: 3 and 1/2 cups, plus extra for dusting
◦ Whole wheat flour: 1/2 cup, for a nuttier flavor and extra fiber
◦ Fine sea salt: 2 teaspoons
◦ Olive oil: 1 tablespoon, for softness and a tender crumb
◦ Optional: 1 teaspoon inulin powder or a pinch of mashed potato, to feed yeast without sugar
👨🍳 Step-by-Step Instructions
1.Wake up the yeast: In a large bowl, combine warm water and yeast. Add inulin powder if using. Let it sit 8-10 minutes until foamy. If it doesn’t foam, your yeast is dead — start over.
2,Build the dough: Add both flours, salt, and olive oil to the yeast water. Mix with a wooden spoon until a shaggy dough forms. It’ll look rough. That’s fine.
3.Knead for strength: Turn dough onto a lightly floured surface. Knead 10 minutes until smooth and elastic. The dough should pass the “windowpane test” — stretch a piece thin enough to see light through without tearing.
4.First rise, slow and cold: Place dough in a lightly oiled bowl, cover with a damp towel, and refrigerate 12 to 18 hours. This slow ferment develops deep flavor without sugar.
5.Shape the marraquetas: Next day, take dough out and let it come to room temp 1 hour. Divide into 6 equal pieces. Roll each into a ball, then use a bench scraper or chopstick to press a deep line down the center without cutting through.
6.Second rise: Place shaped rolls on a parchment-lined baking sheet, cover, and proof 45-60 minutes until puffy. Preheat oven to 450 degrees Fahrenheit ( 232 degrees Celsius ) with a pizza stone or inverted baking sheet inside.
7.Steam for crust: Place a metal pan on the bottom rack. Right before baking, pour 1 cup hot water into the pan to create steam. Slide marraquetas onto the hot stone. Spray oven walls with water 2-3 times in first 5 minutes.
8.Bake to golden: Bake 18-22 minutes until deep golden and hollow-sounding when tapped. Cool 20 minutes before tearing in. The crust will sing as it cools.
💡 Tips & Mistakes to Avoid
◦ Tip 1: Weigh your flour if you can. 3.5 cups bread flour = 420 grams. Scooping packs it in and makes dense bread.
◦ Tip 2: Steam is non-negotiable. No steam = no crackly crust. If you don’t have a pan, spray the loaves heavily before they go in.
◦ Tip 3: Bake on the second day. That cold ferment is where Marraqueta gets its tang. Don’t rush it or you’ll get bland rolls.
◦ Mistake 1: Using water that’s too hot. Anything over 115 degrees Fahrenheit / 46 degrees Celsius kills yeast. If it feels hot to your wrist, it’s too hot for yeast.
◦ Mistake 2: Cutting the center line too shallow. Be aggressive — press almost to the counter. That line is what gives Marraqueta its signature look.
◦ Mistake 3: Slicing while hot. I know it’s tempting, but cutting early releases steam and makes the crumb gummy. Wait 20 minutes.
❓ FAQ
Q1: Can I use all-purpose flour instead of bread flour?
A: You can, but the crust won’t be as chewy. Bread flour has more protein for structure. If using AP, reduce water by 2 tablespoons.
Q2: My yeast didn’t foam. Can I still use it?
A: Nope. No foam = dead yeast = flat bread. Sugar isn’t the issue here; it’s probably old yeast or water temp. Buy fresh yeast and try again.
Q3: How do I store Marraqueta?
A: Same day is best. Day 2, revive it: sprinkle with water and toast at 350°F for 5 minutes. For longer, freeze in a bag. It’ll keep 3 months.
Q4: Is this really sugar-free? What feeds the yeast?
A: Yes. Yeast can feed on flour’s natural starches. The cold ferment gives it time. Inulin or potato is optional but helps with rise if your kitchen is cold.
📌 Summary
Sugar-Free Marraqueta Paceña gives you that authentic La Paz crunch without refined sugar. The secret is time, not sweeteners. Cold fermentation builds flavor, steam builds crust, and patience builds the perfect breakfast roll.

🧀 Recipe 2: Guilt-Free Cuñapé
👩🍳 About this Recipe
If you’ve been to Santa Cruz, you’ve had Cuñapé. These little cheese bombs are made from yuca starch and cheese, baked until the outside is chewy and the inside is molten. Street vendors sell them by the bag, and locals eat them with coffee for “la hora del té.” The traditional recipe uses sugar and sometimes condensed milk. Our version skips all that and leans on the natural sweetness of cheese and a touch of monk fruit. They’re naturally gluten-free, high-protein, and dangerously addictive.
📝 Ingredients & Measurements
Makes 12 Cuñapés
◦ Yuca starch, also called tapioca starch: 2 cups, fine ground
◦ Fresh queso fresco or mozzarella: 2 cups, shredded and not packed
◦ Large eggs: 2, room temperature
◦ Whole milk or unsweetened almond milk: 1/4 cup to 1/3 cup, as needed
◦ Baking powder: 1 teaspoon, aluminum-free
◦ Salt: 1/2 teaspoon, fine sea salt
◦ Monk fruit sweetener, powdered: 1 tablespoon, optional for balance
◦ Melted butter or ghee: 2 tablespoons, for richness
👨🍳 Step-by-Step Instructions
1.Prep the oven: Preheat to 400 degrees Fahrenheit ( 204 degrees Celsius ). Line a baking sheet with parchment. Cuñapé loves to stick, so don’t skip this.
2.Mix dry ingredients: In a big bowl, whisk yuca starch, baking powder, salt, and monk fruit if using. Break up any clumps.
3.Add cheese: Toss shredded cheese into the dry mix. Use your fingers to coat every shred. This prevents cheese pockets and helps distribution.
4.Bind the dough: Make a well in the center. Add eggs, melted butter, and 1/4 cup milk. Mix with a spatula, then hand-knead in the bowl. The dough should be like Play-Doh: soft but not sticky. Add more milk 1 teaspoon at a time if crumbly.
5.Shape the balls: Scoop 2-tablespoon portions and roll into smooth balls. If they crack, your dough is too dry. Wet your hands slightly and re-roll.
6.Space them out: Place balls 2 inches apart. They puff up. Press a slight dimple on top with your thumb so they don’t roll.
7.Bake until spotty: Bake 18-22 minutes. You want golden spots and a firm outside. The inside will still be soft — that’s correct. Don’t overbake or they turn into hockey pucks.
8.Rest briefly: Let them cool 5 minutes on the tray. They’ll deflate a little. Eat warm while the cheese is gooey.
💡 Tips & Mistakes to Avoid
◦ Tip 1: Use dry cheese. If your queso fresco is wet, pat it with paper towels. Too much moisture = flat Cuñapé.
◦ Tip 2: Yuca starch brands vary. If dough feels sandy, add more milk. If sticky, add more starch 1 tablespoon at a time.
◦ Tip 3: Freeze extras unbaked. Roll the balls, freeze on a tray, then bag them. Bake from frozen, adding 3 minutes.
◦ Mistake 1: Opening the oven early. Cold air makes them collapse. No peeking for the first 15 minutes.
◦ Mistake 2: Making them too big. Anything over golf-ball size won’t cook through. Keep them small for that chewy-to-gooey ratio.
◦ Mistake 3: Skipping the rest. Straight from the oven, the starch is molten lava. You’ll burn your mouth and the texture isn’t set. Wait 5 minutes.
❓ FAQ
Q1: Can I make Cuñapé dairy-free?
A: Yes. Use vegan mozzarella shreds and unsweetened almond milk. Replace butter with olive oil. Texture will be less chewy but still good.
Q2: Why did my Cuñapés come out flat?
A: Three culprits: old baking powder, wet cheese, or over-mixed dough. Also check your oven temp with a thermometer.
Q3: Is yuca starch the same as cassava flour?
A: No. Yuca starch is pure starch — white and fine. Cassava flour includes the whole root and is heavier. For Cuñapé, you need starch.
Q4: Can I air fry these?
A: You can. 350°F ( 176°C ) for 10-12 minutes. Work in batches and don’t crowd them. They won’t get the same spotty color but taste great.
📌 Summary
Guilt-Free Cuñapé keeps the soul of Santa Cruz street food while ditching sugar. Yuca starch and cheese do all the heavy lifting for flavor and texture. They’re fast, gluten-free, and perfect for meal prep. Make a double batch — they disappear.

🌾 Recipe 3: Pan de Arroz Sin Azúcar
👩🍳 About this Recipe
Pan de Arroz comes from Bolivia’s eastern lowlands and is especially popular in Beni. It’s a soft, slightly sweet bread made with rice flour, so it’s naturally gluten-free and light on the stomach. Traditionally it calls for sugar and sometimes sweetened condensed milk. We’re using soaked rice for texture and a bit of erythritol for balance, but you can leave it out. This bread is incredible toasted with avocado or as the base for a Bolivian-style breakfast torta.
📝 Ingredients & Measurements
Makes 1 loaf, about 10 slices
◦ Long-grain white rice: 1 cup, soaked overnight
◦ Warm water: 1/2 cup, for blending rice
◦ Active dry yeast: 2 and 1/4 teaspoons
◦ Warm milk or unsweetened plant milk: 1/2 cup, 105°F / 40°C
◦ Eggs: 3 large, room temperature
◦ Olive oil: 1/4 cup
◦ White rice flour: 1 and 1/2 cups, superfine grind works best
◦ Tapioca starch: 1/2 cup, for binding
◦ Psyllium husk powder: 2 tablespoons, gives gluten-like structure
◦ Salt: 1 and 1/2 teaspoons
◦ Erythritol or monk fruit blend: 2 tablespoons, optional
◦ Apple cider vinegar: 1 teaspoon, helps rise
👨🍳 Step-by-Step Instructions
1.Soak and blend rice: Drain soaked rice. Add to blender with 1/2 cup fresh warm water. Blend 2 minutes until it’s a smooth, thick milk. Some tiny grains are okay.
2.Proof the yeast: In a small bowl, mix warm milk and yeast. Let sit 10 minutes until foamy. If using sweetener, add a pinch here to help yeast.
3.Combine wet ingredients: In a stand mixer or large bowl, whisk eggs, olive oil, vinegar, and the blended rice mixture. Add foamy yeast mix.
4.Add dry ingredients: In another bowl, whisk rice flour, tapioca starch, psyllium husk, salt, and remaining sweetener. Pour into wet mix.
5.Beat the batter: This is a batter, not a dough. Beat on medium 3 minutes. It will thicken as psyllium absorbs liquid. Scrape sides. It should look like thick muffin batter.
6.First rise: Scrape into a greased 8x4 inch loaf pan. Smooth the top with wet fingers. Cover and proof in a warm spot 45-60 minutes until it rises to the pan rim.
7.Bake low and slow: Preheat oven to 350°F or 176°C. Bake 45-50 minutes. Tent with foil at 30 minutes if top browns too fast. Internal temp should be 205°F ( 96°C ).
8.Cool completely: This is critical. Let it cool in the pan 10 minutes, then on a wire rack 2 hours. Cutting early = gummy disaster.
💡 Tips & Mistakes to Avoid
◦ Tip 1: Use superfine rice flour. Gritty flour = gritty bread. Bob’s Red Mill or Asian market brands work well.
◦ Tip 2: Don’t skip psyllium husk. It’s the glue in gluten-free baking. Without it, your loaf will crumble.
◦ Tip 3: Toast it. Pan de Arroz is 10x better toasted. It gets crispy outside and stays soft inside.
◦ Mistake 1: Using cold eggs. Cold eggs slow yeast and make a dense loaf. Set them in warm water 5 minutes if you forgot.
◦ Mistake 2: Over-proofing. If it rises above the pan and domes too much, it’ll collapse. Bake when it just hits the rim.
◦ Mistake 3: Slicing warm. Gluten-free breads need to set. If you cut at 30 minutes, it will seem undercooked even if it’s not.
❓ FAQ
Q1: Can I use brown rice instead of white?
A: Yes, but soak it 12 hours and blend longer. Brown rice adds a nuttier taste and more fiber, but the loaf will be denser.
Q2: My bread sank after baking. Why?
A: Usually over-proofed or underbaked. Next time, pull it when it just reaches the pan rim and check temp hits 205°F ( 96°C ).
Q3: Is psyllium husk necessary?
A: For structure, yes. You can sub 1 tablespoon ground chia or flax mixed with 3 tablespoons water, but texture changes.
Q4: How long does it keep?
A: 3 days at room temp in a bread box, or slice and freeze up to 3 months. Toast from frozen.
📌 Summary
Pan de Arroz Sin Azúcar is your gluten-free, sugar-free answer to soft sandwich bread. Soaked rice and psyllium husk create a tender crumb that doesn’t fall apart. It’s proof that traditional Bolivian flavors work for modern diets.
🌄 Final Thoughts: Your Bolivian Bread Journey Starts Now
Baking bread from scratch sounds intimidating until you do it once. Then you realize it’s mostly waiting while yeast and time do the work. These 3 sugar-free Bolivian breads cover all bases: crusty Marraqueta for dipping, cheesy Cuñapé for snacking, and soft Pan de Arroz for sandwiches. None of them need refined sugar, and all of them taste like they came from a La Paz panadería at 6am.
Start with Cuñapé if you’re nervous — it’s the fastest and hardest to mess up. Ready for a project? Do the Marraqueta cold ferment and wake up to dough that’s ready to shape. Need gluten-free? Pan de Arroz has you covered.
Try one this weekend. Take a photo. Share how it went. Did your Marraqueta crackle? Did your kids steal all the Cuñapé? Did Pan de Arroz become your new toast? I want to hear it. Bolivian food deserves more love, and baking it sugar-free makes it something you can share with everyone.
Now go preheat that oven. Bolivia is waiting in your kitchen.
| 🇧🇴 🍞 < Back |