
🏠 Home > 🗺️ Recipes > 🥘 Sauces > 🇻🇳 Vietnam Sauces > 🥘 Nước Chấm (Sweet & Sour Dipping Sauce) , Peanut Sauce (Sốt Đậu Phộng) , Tương Ớt (Vietnamese Chili Garlic Sauce)
🥘 Homemade Vietnamese Sauces: The Key to Authentic Flavor
Published by Supakorn | Updated: February 2026
Introduction: The Unsung Heroes of Vietnamese Cuisine
Hey there, flavor fanatics! If you’ve ever wondered why Vietnamese food tastes so incredibly vibrant, fresh, and perfectly balanced, the answer isn’t just in the main dish—it’s in the sauce. In Vietnamese cooking, sauces and dipping condiments are not just afterthoughts; they are the absolute stars that bring every meal to life.
Imagine sinking your teeth into a fresh Gỏi Cuốn (spring roll) without that rich peanut dip, or trying to eat a bowl of Bún (vermicelli salad) without the tangy dressing—it's unthinkable! These sauces provide the critical balance of sweet, sour, salty, and spicy that defines the cuisine. They are your secret weapon for transforming simple grilled meats, noodles, and fresh vegetables into authentic, unforgettable Vietnamese meals.
Today, we're sharing the recipes for the three most essential Vietnamese sauces that are simple to master and will instantly elevate your home cooking. We’ll cover:
1.Nước Chấm: The classic sweet, sour, and savory dipping sauce for almost everything.
2.Peanut Sauce: The rich, savory, and slightly sweet dip essential for fresh spring rolls (Gỏi Cuốn).
3.Tương Ớt: The homemade, intensely flavorful chili garlic sauce used for dipping and cooking.
Grab your fish sauce and lime juice—it's time to start stirring up some serious flavor!

🔹 Recipe 1: Nước Chấm (Sweet & Sour Dipping Sauce)
About this Recipe: The Essential Vietnamese Condiment
Nước Chấm (often called Nước Chấm Pha) is hands-down the most important dipping sauce in the Vietnamese kitchen. The word Nước means water/liquid, and Chấm means to dip. It is the perfect embodiment of Vietnamese flavor philosophy: a precise balance of the four core tastes. It's acidic (from lime), salty/umami (from fish sauce), sweet (from sugar), and often spicy (from chilies). You'll use it for dipping spring rolls, drizzling over rice dishes (Cơm Tấm), and seasoning noodle salads (Bún).
Ingredients & Measurements
Ingredient - Measurement - Notes
- Water (warm or hot) 1/2 cup (120ml) Helps dissolve the sugar quickly.
- Granulated Sugar 1/4 cup Essential for balancing the lime/fish sauce.
- Fish Sauce (Nước Mắm) 1/4 cup Use a high-quality brand (e.g., Red Boat) for best results.
- Fresh Lime Juice 1/4 cup MUST be freshly squeezed, not bottled.
- Garlic 1-2 cloves, minced
- Thai Chili (Red) 1, thinly sliced Optional, adjust heat to taste.
- Thinly Sliced Carrots/Daikon 1 tablespoon (optional) For a colorful, pickled garnish.
Step-by-Step Instructions
1.Dissolve the Sugar: In a small bowl, combine the warm water and sugar. Stir vigorously until the sugar is fully dissolved and the liquid is clear.
2.Add Fish Sauce: Stir in the fish sauce. The mixture will now be sweet and salty.
3.Add Acidity: Slowly stir in the fresh lime juice. This is the moment the flavor really comes alive. The mixture should now taste balanced between sweet, sour, and salty.
4.Aromatics: Add the minced garlic and sliced chili peppers. Stir well.
5.Garnish and Wait: Add the optional sliced carrots or daikon. The carrots float, which is a visual sign of a perfectly balanced sauce (due to the density). Let the sauce sit for at least 15 minutes before serving. This allows the chili and garlic flavors to bloom.
6.Taste and Adjust: Taste the finished sauce. It should hit all the notes. If it's too sweet, add a tiny bit more lime. Too sour? Add a tiny bit more sugar.
Tips & Mistakes to Avoid
- Tip: The traditional ratio for a classic Nước Chấm is 1 part water, 1 part sugar, 1 part fish sauce, and 1 part lime juice (1:1:1:1), or slightly less lime/more water, but always aim for balance.
- Mistake: Never use bottled lime juice! The lack of natural oils and the pasteurized flavor will ruin the fresh, vibrant taste that Nước Chấm requires.
- Tip: For a lighter, cleaner flavor, use hot water to dissolve the sugar, then chill the sauce slightly before adding the lime juice (this helps preserve the lime's freshness).
- Mistake: Don't skip the resting time. The sauce needs at least 15 minutes for the garlic and chili to properly infuse into the liquid.
FAQ
Q1: How do I make my Nước Chấm less salty?
A1: The saltiness comes from the fish sauce. You need to counteract it by adding more sweetness (sugar) and acidity (lime juice) until the salty flavor is masked by the bright, balanced notes.
Q2: Can I make Nước Chấm ahead of time?
A2: Yes, but hold the fresh aromatics. Prepare the sugar, water, fish sauce, and lime base and store it in the fridge for up to a week. Add the fresh garlic and chili no more than 2-3 hours before serving to prevent the garlic from becoming too pungent or "fermented."
Q3: Is there a vegetarian substitute for fish sauce?
A3: Yes! You can use light soy sauce or a vegetarian mushroom-based seasoning sauce. You might need to add slightly more salt or sugar to replicate the complex umami flavor of the fish sauce.
Summary
Nước Chấm is the essential key to Vietnamese cooking. It's a simple, uncooked sauce that proves how complex and beautiful four basic flavors can be when precisely balanced. Master this one recipe, and you’ve mastered the flavor profile of an entire cuisine.

🔹 Recipe 2: Peanut Sauce (Sốt Đậu Phộng)
About this Recipe: The Perfect Dip for Fresh Spring Rolls
While Nước Chấm is versatile, when it comes to dipping those fresh, herb-filled Gỏi Cuốn (Vietnamese Spring Rolls), a creamy, rich Peanut Sauce is non-negotiable. This sauce is thick, savory, slightly sweet, and intensely nutty. Unlike Thai peanut sauces which often use curry paste, the classic Vietnamese version gets its dark, rich color and unique flavor from Hoisin sauce. This is a quick-cooking sauce that transforms simple ingredients into an addictive dip.
Ingredients & Measurements
Ingredient - Measurement - Notes
- Peanut Butter (creamy) 1/2 cup Use natural peanut butter for the best flavor.
- Hoisin Sauce 1/4 cup Essential for the dark color and deep, savory-sweet flavor.
- Water 1/4 cup (or more) For thinning the sauce to dipping consistency.
- Garlic 2 cloves, minced
- Vegetable Oil 1 tablespoon For sautéing and richness.
- Chili Garlic Sauce (Tương Ớt) 1 teaspoon (optional) For a spicy kick.
Step-by-Step Instructions
1.Sauté Garlic: Heat the oil in a small saucepan over medium heat. Add the minced garlic and sauté quickly for about 30 seconds until fragrant (don't let it burn!).
2.Combine Ingredients: Add the peanut butter, Hoisin sauce, and water to the saucepan.
3.Simmer and Whisk: Reduce the heat to low. Whisk continuously until the peanut butter and Hoisin sauce are completely smooth and integrated. The mixture will thicken as it heats.
4.Adjust Consistency: If the sauce is too thick for dipping, slowly whisk in a little more water, a tablespoon at a time, until it reaches your desired consistency (it should be thick enough to coat the back of a spoon).
5.Final Touches: Stir in the optional chili garlic sauce for heat.
6.Cool: Remove from heat and let cool for 10-15 minutes. The sauce will thicken slightly as it cools. Serve at room temperature with Gỏi Cuốn and crushed peanuts sprinkled on top.
Tips & Mistakes to Avoid
- Tip: If you only have chunky peanut butter, it works fine! Just be prepared to whisk a little longer for a smooth result.
- Mistake: Don't let the sauce boil rapidly. Keep the heat low and whisk gently to prevent the bottom from scorching and the peanut butter from separating.
- Tip: For an extra layer of flavor, replace the water with a little bit of coconut milk for a richer, more luxurious mouthfeel.
- Mistake: Do not use reduced-fat peanut butter. The lack of natural oils will make the sauce grainy and affect the emulsification process.
FAQ
Q1: Why did my Peanut Sauce become too oily/separate?
A1: This usually happens if the heat was too high, or if you used a large amount of very natural, unsweetened peanut butter. To fix it, remove it from the heat and slowly whisk in a tablespoon of warm water or milk until it emulsifies again.
Q2: How should I store leftover Peanut Sauce?
A2: Store it in an airtight container in the refrigerator for up to a week. Note that it will thicken considerably when chilled. You may need to thin it out with a little warm water when reheating or serving.
Q3: What else can I use this sauce for besides spring rolls?
A3: It’s wonderful as a dipping sauce for grilled skewers (like chicken or pork), drizzled over cold noodle salads (Bún), or even as a unique dressing for a simple salad with crisp lettuce.
Summary
The Peanut Sauce is the perfect counterpoint to the fresh, herbaceous spring roll. It relies on the convenience of peanut butter and the savory depth of Hoisin sauce to create a thick, creamy, and irresistible dip. This quick and easy recipe is a game-changer for your appetizer game!
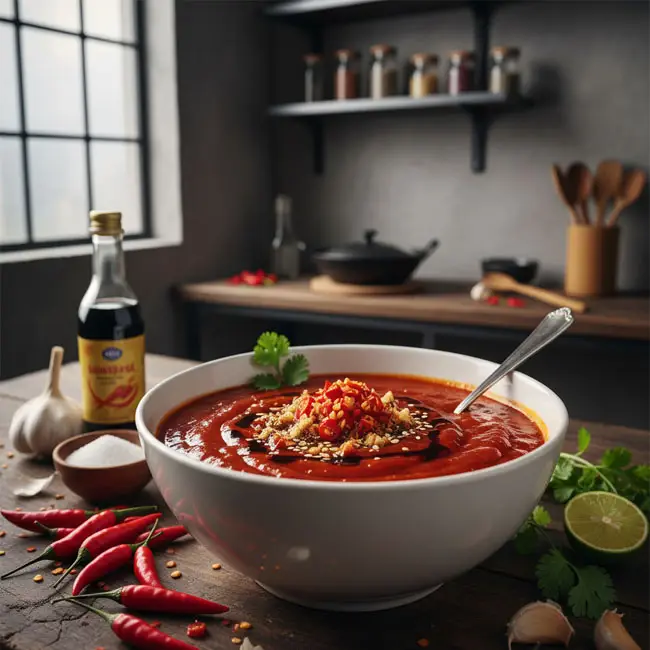
🔹 Recipe 3: Tương Ớt (Vietnamese Chili Garlic Sauce)
About this Recipe: The Ultimate Homemade Heat
Every culture has a signature hot sauce, and in Vietnam, one of the most popular is a variation of Tương Ớt (Chili Sauce), which is often seen in the ubiquitous jars of Sriracha. However, making a fresh, homemade Chili Garlic Sauce is a world apart. It's robust, incredibly garlicky, and has a balanced sweetness and tang that complements the heat. This is used not just as a dipping condiment, but often directly in the broth of Phở or Bún Bò Huế to add complexity and fire.
Ingredients & Measurements
Ingredient - Measurement - Notes
- Red Chili Peppers (Thai/Bird's Eye) 1 cup, stemmed Use fresh, vibrant red chilies for color and heat.
- Garlic 1/2 cup, peeled Generous amount is essential for flavor.
- White Vinegar 1/2 cup For preservation and tang.
- Water 1/4 cup
- Sugar 1/4 cup Balances the heat and acidity.
- Salt 1 teaspoon
- Vegetable Oil 2 tablespoons For sautéing.
Step-by-Step Instructions
1.Prepare Peppers: Roughly chop the chili peppers and garlic. (Wear gloves! Seriously!)
2.Blend: Combine the chopped chilies, garlic, vinegar, water, sugar, and salt in a food processor or blender. Blend until you reach your desired consistency—some like it slightly chunky, others prefer it smooth.
3.Sauté and Cook: Heat the oil in a saucepan over medium heat. Carefully pour the chili mixture into the hot oil.
4.Simmer: Bring the mixture to a low simmer. Cook gently for 10-15 minutes, stirring occasionally. This cooking process mellows the raw garlic and chili taste, helps thicken the sauce, and prevents fermentation.
5.Taste and Adjust: Taste carefully. If it's too vinegary, add a pinch more sugar. If it’s not salty enough, add a small pinch of salt.
6.Cool and Store: Remove from heat and let cool completely. The sauce will thicken as it cools. Store the Tương Ớt in a sterilized, airtight jar in the refrigerator.
Tips & Mistakes to Avoid
- Tip: For a vibrant red color, only use the freshest, reddest Thai chilies available. If you want less heat, use half red bell peppers and half chilies.
- Mistake: Do not skip the cooking process! Simmering is essential to make the sauce safe for storage and to integrate the sugar and vinegar flavors.
- Tip: When storing, ensure the sauce is covered with a thin layer of oil on top; this acts as a natural seal and preservative.
- Mistake: Never blend the chili mixture without wearing gloves. The capsaicin can burn your skin and eyes if you touch your face afterward!
FAQ
Q1: How long does homemade Tương Ớt last?
A1: When stored in a sterilized jar in the refrigerator, homemade Chili Garlic Sauce can last for 3–4 weeks, especially due to the acidity of the vinegar. Always use a clean spoon to scoop it out to prevent contamination.
Q2: What is the best way to reduce the heat?
A2: The simplest way is to substitute up to half of the hot chilies with mild red bell peppers before blending. You can also carefully remove some of the seeds and white membranes (the pith) from the chilies, as this is where most of the heat resides.
Q3: Can I add ginger to this sauce?
A3: Absolutely! Adding a tablespoon of fresh minced ginger during the sautéing process will give the Tương Ớt a wonderful, warm, aromatic depth that is common in many regional Vietnamese chili sauces.
Summary
Tương Ớt is the ultimate customizable hot sauce. By making your own Chili Garlic Sauce at home, you control the heat, the tang, and the garlic intensity. This versatile condiment is perfect for adding fire to your Phở broth, dipping your fried egg rolls, or mixing into your savory marinades.
Final Thoughts: Elevate Every Bite with Authentic Vietnamese Sauces
See how simple it is to elevate your cooking with these essential Vietnamese sauces? The magic of this cuisine is truly in the balance—the sweet and sour tang of Nước Chấm, the creamy richness of the Peanut Sauce, and the powerful punch of Tương Ớt.
These aren't complicated, multi-hour recipes. They are quick, fresh, and require only a few quality ingredients, making them perfect for weeknight prep. We encourage you to start with the foundational Nước Chấm and then branch out into the creamy and spicy worlds.
Once you have these three sauces stocked in your fridge, you'll find that making authentic Vietnamese food at home becomes incredibly easy and infinitely more delicious. Try making a batch this week, and let us know which sauce became your new go-to for dipping, drizzling, and daring to spice up your plate!
| 🇻🇳 🥘 < Back |