
🏠 Home > 🗺️ Recipes > 🍱 Snacks > 🇺🇸 USA Snacks > 🍱 Homemade Soft Pretzels with Zesty Cheddar Dip , The Best Classic No-Bake Cookies , Easy Baked Mini Corn Dogs
🍱 Savor the States: Three Must-Try USA Snack Recipes to Delight Your Loved Ones
Published by Supakorn | Updated: February 2026
🥨 Introduction: Your Passport to American Snack Greatness
Hey everyone! Are you ready to take your snack game to the next level? Sometimes, nothing beats a classic American treat. These aren't just little bites; they're slices of Americana, often tied to movie nights, weekend gatherings, or fun trips to the state fair. American snacks have this unique charm—they’re comforting, satisfying, and usually come in portions large enough to share with everyone you love!
Here in this super-detailed, friendly guide, we’re diving deep into three of the absolute best, most crowd-pleasing snack recipes from the USA. Forget those sad, pre-packaged bags; we're talking about making the good stuff from scratch!
We’ve curated a trio of winners that are perfect for any occasion:
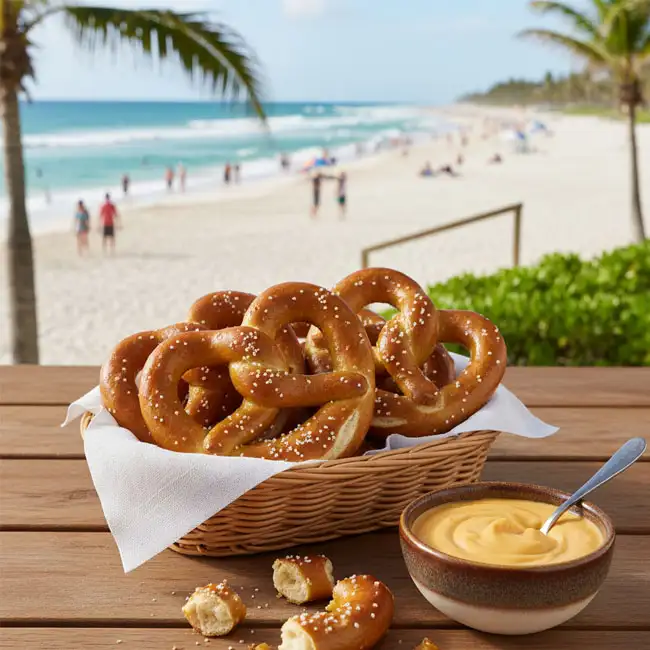
✨ Recipe 1: Homemade Soft Pretzels with Zesty Cheddar Dip – That irresistible, chewy, salty, and warm dough paired with a creamy, sharp dip. Pure comfort!
✨ Recipe 2: The Best Classic No-Bake Cookies – A lightning-fast chocolate and peanut butter oat treat that’s perfect for a quick fix or when it's too hot to turn on the oven.
✨ Recipe 3: Easy Baked Mini Corn Dogs – The fun, savory carnival favorite, made smaller and easier at home (and baked, not deep-fried, for a slightly lighter touch!).
Whether you're hosting a party, looking for a fun cooking project with the kids, or just craving something truly delicious, these recipes are your new go-to. Get your apron on, and let's start cooking!
🥨 Recipe 1: Homemade Soft Pretzels with Zesty Cheddar Dip
There is something truly magical about a warm, perfectly chewy soft pretzel. Maybe you’ve grabbed one at a ball game, a mall food court, or a street vendor. The moment you pull that salty, golden-brown knot apart, you know you’re in for a treat. Making them at home might sound intimidating, but trust me, it’s way easier than you think, and the result is infinitely better! Plus, we're pairing it with a rich, zesty cheddar cheese dip that is absolutely addictive.
🥨 About this Recipe
These soft pretzels are made using a simple yeast dough that gives them their signature airy-but-chewy texture. The key to their authentic flavor and beautiful color is a quick dip in a boiling water bath mixed with baking soda right before baking—this process is crucial for achieving that classic pretzel crust and flavor. They are savory, a little salty, and the ultimate handheld comfort food. The homemade cheddar dip just seals the deal, offering a creamy contrast to the warm, chewy dough.
🥨 Ingredients & Measurements
Here's everything you'll need for about 8–10 large pretzels and a generous bowl of dip:
For the Soft Pretzels:
• Warm Water: 1 and 1/2 cups (about 105 °F – 115 °F)
• Active Dry Yeast: 1 packet or 2 and 1/4 teaspoons
• Granulated Sugar: 1 teaspoon
• All-Purpose Flour: 4 and 1/2 cups (plus extra for dusting)
• Fine Sea Salt (for dough): 1 teaspoon
• Unsalted Butter: 2 tablespoons, melted
• Baking Soda (for water bath): 1/2 cup
• Warm Water (for water bath): 8 cups
• Coarse Pretzel Salt: For topping
For the Zesty Cheddar Dip:
• Unsalted Butter: 2 tablespoons
• All-Purpose Flour: 2 tablespoons
• Milk: 1 and 1/2 cups (whole milk works best)
• Sharp Cheddar Cheese: 8 ounces, shredded (freshly shredded melts better!)
• Cream Cheese: 2 ounces, cubed
• Dijon Mustard: 1 teaspoon
• Garlic Powder: 1/2 teaspoon
• Hot Sauce (optional, for flavor, not heat): A few dashes
🥨 Step-by-Step Instructions
Part 1: Making the Dough
1.Activate the Yeast: In a large bowl, mix the 1 and 1/2 cups of warm water, yeast, and 1 teaspoon of sugar. Let it sit for 5–10 minutes until it looks foamy and bubbly—that means your yeast is active and ready!
2.Mix Dry Ingredients: In a separate large bowl or stand mixer bowl, whisk together the flour and 1 teaspoon of fine salt.
3.Combine: Pour the yeast mixture and the 2 tablespoons of melted butter into the flour. Mix with a spoon or a dough hook until the dough comes together.
4.Knead: Turn the dough out onto a lightly floured surface and knead for 5–7 minutes until it forms a smooth, elastic ball. If using a stand mixer, knead on medium-low speed for about 5 minutes.
5.First Rise: Place the dough ball into a lightly oiled bowl, turn it to coat, cover it with plastic wrap, and let it rise in a warm spot for about 1 hour, or until it has roughly doubled in size.
6.Shape: Preheat your oven to 400 °F (200 °C). Punch the dough down gently and divide it into 8–10 equal pieces. Roll each piece into a rope about 24–30 inches long, tapering the ends slightly. To form the classic shape, make a U-shape, cross the ends twice, and then gently pull the ends down to meet the bottom of the U. Place them on a baking sheet lined with parchment paper.
Part 2: The Baking Soda Bath
1.Prepare the Bath: Bring the 8 cups of water and 1/2 cup of baking soda to a rolling boil in a large, wide pot.
2.Dip: Carefully drop one pretzel at a time into the boiling bath for only 30 seconds (no longer!). Use a slotted spoon or spatula to quickly remove it, allowing the excess water to drip off, and place it back on the parchment-lined baking sheet.
3.Salt: Immediately sprinkle the tops of the wet pretzels generously with the coarse pretzel salt.
Part 3: Baking
1.Bake: Bake the pretzels for 12–15 minutes, rotating the pan halfway through, until they are deep golden brown. Let them cool slightly on a wire rack while you make the dip.
Part 4: Making the Zesty Cheddar Dip
1.Make a Roux: In a medium saucepan, melt the 2 tablespoons of butter over medium heat. Whisk in the 2 tablespoons of flour and cook for 1 minute, stirring constantly. This is called a roux.
2.Add Milk: Gradually whisk in the 1 and 1/2 cups of milk, making sure there are no lumps. Continue to stir until the mixture thickens and starts to simmer (about 3–5 minutes).
3.Melt Cheese: Reduce the heat to low. Stir in the shredded cheddar, cream cheese, Dijon mustard, garlic powder, and hot sauce (if using). Stir until the cheeses are completely melted and the dip is smooth and creamy. Taste and add a pinch of salt and pepper if needed.
4.Serve: Serve the warm pretzels immediately with the warm cheddar dip.
🥨 Tips & Mistakes to Avoid
• Use Warm Water: When activating the yeast, the water should be between 105 °F and 115 °F. Too cold, and the yeast won't activate; too hot, and you'll kill it! Use a kitchen thermometer if you are unsure.
• The Bath is Essential: Do not skip the baking soda bath! It’s what gives the pretzel its unique flavor, dark brown color, and that chewy exterior. Don't let them sit in the bath for more than 30 seconds, or they can taste metallic.
• Don't Over-Knead: Over-kneading can result in tough, dense pretzels. The dough should be smooth and elastic, but not overly stiff.
• Coarse Salt: Regular table salt will dissolve during baking. Use coarse sea salt or, ideally, dedicated pretzel salt for that classic crunchy, salty bite.
🥨 FAQ
Q: Can I make the dough ahead of time?
A: Yes! After the first rise, you can punch the dough down, place it in an oiled bowl, cover it tightly, and refrigerate it for up to 24 hours. Let it come back to room temperature for about 30 minutes before shaping and boiling.
Q: I don't have a stand mixer, can I still make this?
A: Absolutely! The recipe is written for hand kneading. It’s a great workout and very rewarding!
Q: Can I use different cheeses for the dip?
A: Of course! Monterey Jack, Gouda, or a blend of cheeses works great. Just make sure you use a good melting cheese.
🥨 Summary
These Homemade Soft Pretzels with Zesty Cheddar Dip are truly a game-changer. They elevate a simple snack into a memorable culinary experience. The aroma of them baking alone is worth the effort! They are wonderfully chewy, perfectly salted, and the rich, creamy cheese dip is the ideal companion. Serve these at your next get-together and watch them disappear!

🍪 Recipe 2: The Best Classic No-Bake Cookies
Sometimes you want an incredible, satisfying dessert right now, and you don't want to mess with preheating the oven, cooling racks, or a long clean-up. Enter the No-Bake Cookie. This simple, three-minute stovetop magic turns into a delightfully chewy, chocolate-peanut-butter-oat treat that is a beloved classic in many American homes. They're quick, easy, and practically impossible to mess up, making them the perfect recipe to share with new bakers.
🍪 About this Recipe
This recipe is built on a few simple pantry staples: butter, sugar, milk, cocoa powder, peanut butter, and quick-cooking oats. The trick is boiling the liquid ingredients for a precise amount of time to reach a "soft-ball" stage consistency without a thermometer. This ensures the cookies set up perfectly—not too dry and crumbly, and not too gooey and unset. They are rich, fudgy, and chewy—a perfect, handheld indulgence.
🍪 Ingredients & Measurements
This recipe yields about 30–35 cookies, depending on the size:
• Granulated Sugar: 2 cups
• Unsalted Butter: 1/2 cup (1 stick)
• Milk: 1/2 cup (any kind works)
• Unsweetened Cocoa Powder: 4 tablespoons (or 1/3 cup)
• Creamy Peanut Butter: 1/2 cup
• Vanilla Extract: 1 teaspoon
• Quick-Cooking Oats (not instant or steel-cut): 3 cups
• Pinch of Salt: 1/4 teaspoon (optional, but enhances the chocolate)
🍪 Step-by-Step Instructions
1.Prep: Lay out two sheets of wax paper or parchment paper on your counter. Measure out your oats and peanut butter and have them standing by. Speed is essential in the last step!
2.Combine Wet Ingredients: In a medium saucepan, combine the sugar, butter, milk, and cocoa powder.
3.Boil: Place the saucepan over medium heat. Bring the mixture to a full, rolling boil, stirring constantly. Once it hits a full boil (where bubbles break even when stirring), start a timer for exactly 60 seconds.
4.Boil Time: Keep the mixture at a full boil for the entire 60 seconds, stirring the entire time to prevent scorching.
5.Remove & Add Flavor: Immediately remove the saucepan from the heat. Stir in the peanut butter, vanilla extract, and pinch of salt until the peanut butter is completely melted and the mixture is smooth.
6.Add Oats: Quickly stir in the 3 cups of quick-cooking oats. Mix until the oats are fully coated in the chocolate mixture. Do not over-mix, but make sure everything is evenly coated.
7.Drop & Set: Working quickly, drop heaping tablespoons of the mixture onto the prepared wax paper.
8.Cool: Let the cookies cool and set completely at room temperature for about 30–60 minutes. If you are in a rush, you can pop them in the refrigerator for about 20 minutes to speed up the process. Once set, they will lift right off the paper.
🍪 Tips & Mistakes to Avoid
• The 60-Second Boil: This is the most crucial part. Boiling for too long results in dry, crumbly cookies that don't hold their shape. Boiling for too short a time results in cookies that never set up and remain gooey. Stick to exactly 60 seconds of a full rolling boil.
• Use Quick Oats: Do not use instant or steel-cut oats. Quick-cooking oats are pre-cooked and rolled thinner, giving the cookies the perfect, soft, chewy texture.
• Work Fast: Once the oats are added, the mixture will start to set quickly. Have your wax paper ready and drop the cookies immediately.
• High Altitude: If you live at a high altitude, you might need to boil for an extra 10–15 seconds to ensure they set properly.
🍪 FAQ
Q: My cookies are too crumbly! What happened?
A: You likely boiled the mixture for too long, which evaporated too much moisture, or your heat was too high. The sugar mixture caramelized too much. Next time, make sure it’s exactly 60 seconds from the moment it hits a full boil.
Q: My cookies won't set, and they are still sticky. Why?
A: You boiled the mixture for too short a time, or the mixture never reached a full rolling boil. This means there was too much moisture left, and the sugar didn't reach the proper setting stage.
Q: Can I use natural peanut butter?
A: Traditional no-bakes rely on the stabilizers and added sugar in commercial peanut butter. Natural, oilier peanut butter can sometimes prevent the cookies from setting up correctly. Use the classic creamy kind for the best results!
🍪 Summary
The Classic No-Bake Cookie is the ultimate answer to that fast-and-furious snack craving. They are ridiculously easy, require zero oven time, and deliver a decadent, satisfying punch of chocolate and peanut butter. They are perfect for last-minute treats, lunchbox additions, or just a fun, quick project with friends. Keep the main steps in mind (especially that 60-second boil!), and you’ll have a lifetime favorite recipe!

🌭 Recipe 3: Easy Baked Mini Corn Dogs
Take yourself back to the state fair or a fun family picnic! Corn dogs are the quintessential American carnival food—savory, slightly sweet, and unbelievably satisfying. They are traditionally deep-fried, but we're going to make an easy, healthier, and less messy version by baking them at home. By making them mini, they become the ultimate shareable snack or party appetizer!
🌭 About this Recipe
These mini corn dogs use a simple, homemade cornmeal batter that bakes up beautifully around small pieces of hot dog. The batter is subtly sweet from the cornmeal and a touch of sugar, creating a perfect balance with the salty, savory hot dog inside. Baking them on a stick makes them fun and easy to eat, but you can also bake them as little bite-sized "nuggets" if you prefer to skip the sticks. They're amazing dipped in ketchup, mustard, or even a spicy BBQ sauce.
🌭 Ingredients & Measurements
This recipe makes about 18–20 mini corn dogs:
• All-Purpose Flour: 1 cup
• Fine Yellow Cornmeal: 1 cup (not coarse polenta)
• Granulated Sugar: 1/4 cup
• Baking Powder: 1 tablespoon
• Salt: 1/2 teaspoon
• Egg: 1 large
• Buttermilk: 1 cup (or 1 cup regular milk + 1 tablespoon white vinegar, left to sit for 5 minutes)
• Canola or Vegetable Oil: 2 tablespoons
• Hot Dogs: 8–10 standard size, high-quality, cut into 2-inch pieces
• Wooden Skewers: 18–20 small (4-inch) skewers or lollipop sticks
🌭 Step-by-Step Instructions
1.Prep the Hot Dogs: Preheat your oven to 400∘F / 200∘C. Cut the hot dogs into small, 2-inch long pieces. Carefully insert a small wooden skewer or lollipop stick into the center of each piece, leaving enough room to hold onto. Pat the hot dog pieces very dry with a paper towel—this helps the batter stick! Place the skewered hot dogs on a small plate.
2.Make the Batter: In a large bowl, whisk together the flour, cornmeal, sugar, baking powder, and salt.
3.Add Wet Ingredients: In a separate bowl, whisk together the egg, buttermilk (or soured milk), and vegetable oil.
4.Combine: Pour the wet ingredients into the dry ingredients and whisk until just combined. The batter should be smooth, thick, and pourable. Do not over-mix, as this can make the batter tough.
5.Coat the Hot Dogs: Transfer the batter into a tall, narrow glass or mug—this makes dipping easier! Dip one hot dog piece at a time, making sure it’s completely coated in the batter. Lift it out, allowing any excess batter to drip back into the mug.
6.Bake: Carefully lay the coated hot dogs onto a baking sheet lined with parchment paper or a silicone mat. The batter might pool slightly at the bottom, which is normal.
7.Bake Time: Bake for 12–15 minutes, rotating the pan halfway through, until the corn dog batter is golden brown and cooked through.
8.Serve: Let them cool for a few minutes before handling, and serve immediately with your favorite dipping sauces (ketchup, mustard, etc.).
🌭 Tips & Mistakes to Avoid
• Dry Hot Dogs are Key: Wet hot dogs will cause the batter to slip right off! Pat them very, very dry before dipping.
• The Right Consistency: The batter should be thick enough to coat the hot dog pieces well. If it seems too thin, let it sit for 5 minutes to allow the cornmeal to hydrate, or add a tablespoon more of cornmeal.
• The Tall Mug Trick: Dipping the hot dogs in a tall, narrow glass ensures the entire piece gets evenly coated with less mess than a wide bowl.
• Don't Overcrowd: Give the corn dogs some space on the baking sheet so they can bake evenly and get nice and golden.
🌭 FAQ
Q: Can I use regular milk instead of buttermilk?
A: Yes! Simply mix 1 tablespoon of white vinegar or lemon juice into 1 cup of regular milk and let it sit for 5 minutes before using. This creates a quick 'buttermilk' substitute that adds the necessary tang and helps activate the baking powder.
Q: What kind of hot dogs should I use?
A: Use a high-quality, all-beef hot dog. Since they are the star of the show, a good flavor here makes a big difference.
Q: Can I freeze the leftovers?
A: Yes! Once completely cooled, place the mini corn dogs in a freezer-safe bag. To reheat, bake them from frozen at 350∘F or 175∘C for about 10–12 minutes.
🌭 Summary
These Easy Baked Mini Corn Dogs are a total blast! They deliver all the flavor and fun of the classic fair food without the hassle of deep-frying. The cornmeal batter is a perfect, subtly sweet foil to the savory hot dog, and making them mini means they are easy for everyone to enjoy. They are a guaranteed hit for parties, game days, or a fun afternoon treat!
✨ Final Thoughts
Well, there you have it—three incredible, tried-and-true American snack recipes that are absolutely perfect for sharing. We’ve covered savory comfort with the Soft Pretzels, quick decadence with the No-Bake Cookies, and ultimate party fun with the Mini Corn Dogs.
I hope this guide has shown you that making these iconic, crowd-pleasing snacks at home is not only doable but also incredibly fun and rewarding! Homemade versions just taste so much better than anything you can buy pre-made.
Don't feel like you need to tackle all three at once! Maybe start with the No-Bake Cookies for a super-quick win, or dive into the Pretzels for a fun weekend baking project. Once you master one, the others will feel easy.
Give one of these a try this week! Your family and friends will seriously thank you. Once you do, come back and share your experience. Did you nail the pretzel shape? Did the No-Bake Cookies set perfectly? We'd love to hear about your culinary adventures
| 🇺🇸 🍱 < Back |