
🏠 Home > 🗺️ Recipes > 🍞 Breads > 🇬🇩 Grenada Breads > 🍞 1.Fluffy Gluten-Free Coconut Bakes (The Breakfast Legend) , 2.Traditional Grenadian Cassava Bread (The Ancient Starchy Staple) , 3.Sweet & Spiced Nutmeg Tea Bread (The Ultimate Afternoon Treat)
🍞 Tropical Hearth: Master the Art of Gluten-Free Grenadian Baking
Published by Supakorn | Updated: April 2026
🇬🇩 🏔️ Introduction: Breaking Bread on the Spice Isle 🌊 🥖
Hey there, my fellow baker! If you’ve ever tried to cut gluten out of your diet, you know the struggle is real. Finding a piece of bread that doesn't crumble like a dry cracker or taste like cardboard can feel like searching for a needle in a haystack. But what if I told you that the secret to the perfect gluten-free loaf isn't hidden in a high-tech lab, but in the traditional kitchens of Grenada?
Grenada, famously known as the "Spice Isle," has always been a place where people cook with what the earth provides. Long before gluten-free was a "trend" in Western supermarkets, islanders were already using naturally gluten-free starches like cassava, corn, and coconut to create incredible breads. Today, as wellness travel and gluten-free lifestyles become the norm globally, these ancient island secrets are finally getting the spotlight they deserve.
In this deep dive into Caribbean baking, we are going to tackle three of the most beloved Grenadian breads, adapted specifically for those who need (or want) to skip the wheat. We are talking about textures that are soft, flavors that are rich with spice, and recipes that are simple enough for a Tuesday afternoon.
Here is our island-inspired baking lineup:
🧇 • Recipe 1: Fluffy Gluten-Free Coconut Bakes (The Breakfast Legend)
🥞 • Recipe 2: Traditional Grenadian Cassava Bread (The Ancient Starchy Staple)
🥖 • Recipe 3: Sweet & Spiced Nutmeg Tea Bread (The Ultimate Afternoon Treat)
Ready to make your kitchen smell like a tropical bakery? Put on your apron, and let’s get started!
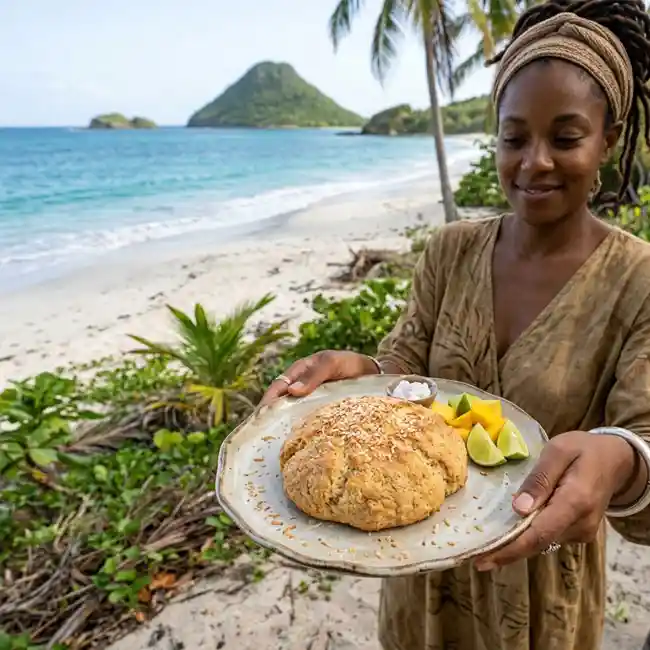
🥥 Recipe 1: Fluffy Gluten-Free Coconut Bakes
🥣 About this Recipe
In Grenada, "Bakes" are an absolute institution. Usually, they are made with wheat flour and fried or roasted, served alongside saltfish or avocado. They are essentially the "biscuit" of the Caribbean. This gluten-free version uses coconut flour and a high-quality gluten-free all-purpose blend to recreate that signature soft, slightly chewy interior and golden crust. The addition of fresh coconut milk adds a depth of flavor that no plain wheat bread could ever match.
🧂 Ingredients & Measurements
• 2 cups of Gluten-Free All-Purpose Flour Blend (ensure it contains Xanthan Gum)
• 1/2 cup of Coconut Flour (sifted to remove lumps)
• 1/2 cup of fresh shredded coconut (unsweetened)
• 1 tablespoon of baking powder
• 1/2 teaspoon of sea salt
• 2 tablespoons of coconut sugar or honey
• 3 tablespoons of chilled coconut oil (solid)
• 3/4 cup of warm coconut milk (full fat)
• 1/2 teaspoon of ground cinnamon
🔪 Step-by-Step Instructions
1.In a large mixing bowl, whisk together your gluten-free flour blend, coconut flour, shredded coconut, baking powder, salt, sugar, and cinnamon.
2.Add the chilled coconut oil to the dry ingredients. Use your fingers or a pastry cutter to "rub" the oil into the flour until it looks like coarse crumbs.
3.Slowly pour in the warm coconut milk. Stir with a wooden spoon until a soft dough forms. Gluten-free dough is usually a bit stickier than wheat dough—don't panic!
4.Let the dough rest for 10 minutes. This allows the coconut flour to fully hydrate.
5.Dust your hands with a little extra flour and pull off pieces of dough about the size of a golf ball. Flatten them into discs about 1/2 inch thick.
6.You can bake these or pan-fry them. For the healthier baked version: Preheat your oven to 375°F (190°C).
7.Place the discs on a parchment-lined baking sheet and bake for 15 to 20 minutes until the tops are golden brown.
8.Serve warm with a bit of vegan butter or a slice of fresh avocado.
⚠️ Tips & Mistakes to Avoid
• The Resting Period: Coconut flour is like a sponge. If you don't let the dough rest, your bakes might turn out too wet. Give it that 10-minute "nap."
• Don't Over-flatten: If you press the discs too thin, they will become hard like cookies. Keep them about 1/2 inch thick for a soft center.
• Xanthan Gum Check: If your flour blend doesn't have xanthan gum, add 1/2 teaspoon to the recipe. Without it, the bakes will crumble into pieces.
❓ FAQ
Q1.Can I fry these instead?
Yes! Shallow fry in coconut oil over medium heat for 3 minutes per side until golden.
Q2.How do I store them?
Keep them in an airtight container for 2 days, or freeze them and pop them in the toaster to revive that "just-baked" feel.
📝 Summary
These Coconut Bakes are proof that you don't need gluten to have a satisfying, soul-warming breakfast. They are dense in nutrients and packed with tropical aroma.
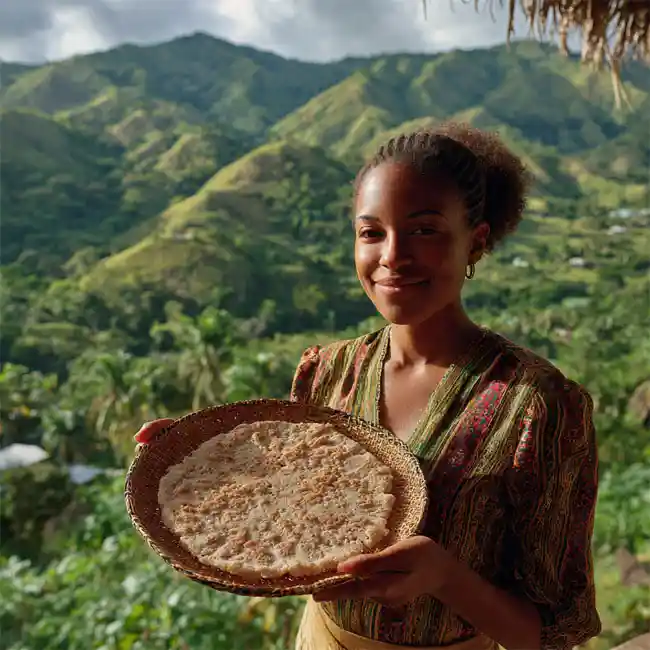
🍠 Recipe 2: Traditional Grenadian Cassava Bread
🥣 About this Recipe
Cassava (also known as Yuca) is a root vegetable that has been a staple in Grenada since the days of the indigenous Carib people. Cassava bread is naturally gluten-free and has a unique, slightly nutty flavor and a wonderful "bounce" in its texture. It’s a flatbread that is incredibly sturdy, making it perfect for dipping into soups or stews. This is as "wellness-focused" as baking gets—simple, ancient, and highly effective.
🧂 Ingredients & Measurements
• 3 cups of fresh Cassava (peeled and grated finely)
• 1/2 cup of coconut milk (if the cassava is very dry)
• 1/2 teaspoon of sea salt
• 1 tablespoon of coconut oil (for the pan)
• 1/4 teaspoon of ground ginger (optional, for a digestive boost)
🔪 Step-by-Step Instructions
1.After grating your fresh cassava, place it in a clean kitchen towel or cheesecloth. Squeeze it hard over a sink to remove as much of the liquid starch as possible. You want the cassava to be relatively dry and "fluffy."
2.In a bowl, toss the grated cassava with the salt and ginger. If the mixture feels like dry sand and won't hold together at all, add a splash of coconut milk until it feels like damp clay.
3.Heat a heavy skillet or griddle over medium heat and lightly coat with coconut oil.
4.Take a handful of the cassava mixture and spread it directly onto the hot pan, pressing it down with a spatula to form a large, thin circle (about 1/4 inch thick).
5.Cook for about 5 to 7 minutes on the first side. You will see the edges start to lift and turn a pale golden color.
6.Carefully flip the bread over and cook for another 5 minutes on the other side.
7.The bread should be firm and slightly crisp on the outside but soft in the middle.
8.Remove and wrap in a clean towel to keep it soft while you cook the rest.
⚠️ Tips & Mistakes to Avoid
• Squeeze Properly: If you leave too much juice in the cassava, the bread will be gummy and take forever to cook. Squeeze like you mean it!
• Heat Control: If your pan is too hot, the outside will burn before the inside is cooked. Keep it at a steady medium heat.
• Fresh vs. Frozen: You can use frozen grated cassava, but make sure to thaw it completely and squeeze out the excess water before starting.
❓ FAQ
Q1.Is this the same as Bammy?
Very similar! "Bammy" is the Jamaican name, but the technique is widely used across the Caribbean including Grenada.
Q2.What does it taste like?
It’s very mild and earthy, which is why it goes so well with spicy Grenadian sauces or stews.
📝 Summary
Cassava bread is a triumph of traditional wisdom. It’s a single-ingredient powerhouse that provides a gluten-free alternative that is both filling and incredibly healthy.

🍂 Recipe 3: Spiced Nutmeg & Honey Tea Bread
🥣 About this Recipe
You can't talk about Grenada without talking about Nutmeg. This tea bread is the "sweet loaf" of the island. Traditionally made with white flour and butter, our gluten-free version uses almond flour for moisture and honey for sweetness. The result is a cake-like bread that is incredibly fragrant. It’s the perfect companion for a cup of herbal tea or coffee, providing a cozy island vibe no matter where in the world you are.
🧂 Ingredients & Measurements
• 1 1/2 cups of Almond Flour (fine ground)
• 1/2 cup of Tapioca Flour (for a bit of "stretch")
• 1 tablespoon of freshly grated Grenadian Nutmeg
• 1 teaspoon of ground cinnamon
• 1 teaspoon of baking soda
• 1/4 teaspoon of sea salt
• 3 large eggs (at room temperature)
• 1/3 cup of raw honey or maple syrup
• 1/4 cup of melted coconut oil
• 1 teaspoon of vanilla extract
🔪 Step-by-Step Instructions
1.Preheat your oven to 350°F (175°C) and grease a standard loaf pan with coconut oil.
2.In a medium bowl, whisk together the almond flour, tapioca flour, nutmeg, cinnamon, baking soda, and salt.
3.In a larger bowl, beat the eggs until they are frothy. Add the honey, melted coconut oil, and vanilla extract. Whisk until smooth.
4.Slowly fold the dry ingredients into the wet ingredients using a spatula. Mix until just combined—don't overwork the almond flour or it can become oily.
5.Pour the batter into the prepared loaf pan and smooth the top.
6.Optional: Sprinkle a little extra nutmeg and a few sliced almonds on top for decoration.
7.Bake for 30 to 35 minutes, or until a toothpick inserted into the center comes out clean.
8.Let the bread cool in the pan for 15 minutes before transferring it to a wire rack to cool completely. This step is vital for gluten-free breads to set their structure!
⚠️ Tips & Mistakes to Avoid
• The Cooling Rule: Gluten-free breads continue to "structure" themselves as they cool. If you cut it while it’s hot, it might seem damp or fall apart. Patience is key!
• Freshly Grated Nutmeg: I’ll say it again—freshly grating the nutmeg seed makes a world of difference. The flavor is deeper, woodier, and much more "Grenadian."
• Almond Flour Texture: Make sure you use "super-fine" almond flour. If it’s too coarse (almond meal), the bread will have a grainy texture.
❓ FAQ
Q1.Can I make this vegan?
You can try substituting the 3 eggs with "flax eggs" (3 tbsp flax meal + 9 tbsp water), but the bread will be much denser and won't rise as much.
Q2.Does it freeze well?
Yes! Slice the loaf before freezing so you can grab a single slice whenever you need a treat.
📝 Summary
This Spiced Nutmeg Bread is a celebration of the Spice Isle in every bite. It’s moist, aromatic, and low-glycemic, making it a "smart" sweet treat for your wellness journey.
✨ Final Thoughts: Your Island Baking Journey
There you have it! Three incredible, gluten-free breads that bring the authentic spirit of Grenada right to your table. From the tropical comfort of Coconut Bakes to the ancient simplicity of Cassava Bread and the aromatic sweetness of Nutmeg Tea Bread, you now have a full toolkit for healthy Caribbean baking.
The most important thing to remember is that gluten-free baking is a skill that gets better with every loaf. Don't be afraid to experiment with the spices or the thickness of your bakes. These recipes are meant to be lived in—not just followed.
I challenge you to try the Coconut Bakes first—they are a great entry point into the world of island flavors. Once you’ve mastered those, move on to the Cassava bread to experience a true piece of history.
When you finish your first batch, I’d love to hear how it went! Did the smell of nutmeg fill your home? Did you find a new favorite breakfast? Share your baking stories with me—it’s the best part of the cooking journey. Happy baking, friend! 🥥🥖✨
| 🇬🇩 🍞 < Back |