
🏠 Home > 🗺️ Recipes > 🍨 Desserts > 🇨🇦 Canada Desserts > 🍨 1.No-Bake Nanaimo Bars , 2.Classic Gooey Butter Tarts , 3.Homemade "BeaverTails" Fry Bread
🍨 Sweet Treats from the North: Legendary Canadian Desserts for Less
Published by Supakorn | Updated: May 2026
🇨🇦 🍩 Introduction: The Sweet Side of the Great White North
Have you ever noticed how some of the best memories of traveling involve food? Specifically, that first bite of a local dessert that makes your eyes widen and your heart skip a beat? Canada is famous for many things—the turquoise waters of Lake Louise, the rugged beauty of the Maritimes, and the friendly "Eh?" you hear in every coffee shop. But if you ask a local what truly defines home, they’ll probably point to a tray of sweets sitting on a kitchen counter.
Canadian dessert culture is all about comfort. It’s about rich, buttery, and sugary treats that can warm you up during a cold snowy evening or act as the perfect companion to a lakeside picnic in the summer. These recipes have traveled far beyond the Canadian borders, becoming favorites in bake shops from London to New York. However, you don’t need to spend a fortune at a gourmet bakery to experience them.
In fact, some of the most iconic treats in Canada were born out of necessity—using simple, affordable pantry staples to create something magical. Today, I’m showing you how to recreate that northern magic in your own kitchen for a total cost that would make any budget-shopper smile.
We are going to master three legendary sweets:
🥮 • Recipe 1: Classic Nanaimo Bars (The ultimate no-bake triple threat)
🍯 • Recipe 2: Traditional Butter Tarts (Gooey, flaky, and purely Canadian)
🎂 • Recipe 3: Homemade "BeaverTails" Style Fry Bread (Warm, cinnamon-sugary goodness)
Ready to satisfy that sugar craving? Let's get baking!

🍫 Recipe 1: No-Bake Nanaimo Bars
🍰 About this Recipe
Named after the city of Nanaimo on Vancouver Island, British Columbia, these bars are a Canadian legend. They are world-famous because they require absolutely no oven time, which is perfect for hot days or when you’re feeling a bit lazy. A Nanaimo bar consists of three glorious layers: a chocolatey coconut-graham cracker base, a thick custard-flavored middle, and a smooth chocolate ganache on top. It’s rich, decadent, and looks like it cost a lot more than it actually did!
🍰 Ingredients & Measurements
For the Base:
• Half a cup of unsalted butter
• Quarter cup of granulated sugar
• 5 tablespoons of cocoa powder
• 1 large egg (beaten)
• 1 and three-quarter cups of graham cracker crumbs
• 1 cup of shredded coconut (unsweetened)
• Half a cup of finely chopped walnuts (optional, skip to save money!)
For the Middle Layer:
• Half a cup of softened butter
• 3 tablespoons of heavy cream
• 2 tablespoons of custard powder (or vanilla pudding mix)
• 2 cups of powdered sugar (icing sugar)
For the Top Layer:
• 4 ounces of semi-sweet chocolate
• 2 tablespoons of butter
🍰 Step-by-Step Instructions
1.The Base: Melt the butter, sugar, and cocoa powder in a saucepan over low heat. Once smooth, slowly whisk in the beaten egg until the mixture thickens. Remove from heat and stir in the graham cracker crumbs and coconut. Press this firmly into a greased 8x8 inch square pan. Pop it in the fridge while you do the rest.
2.The Filling: Cream the softened butter, custard powder, and heavy cream together until fluffy. Gradually add the powdered sugar until you have a thick, spreadable frosting. Spread this evenly over your chilled base. Put it back in the fridge for 30 minutes to set.
3.The Topping: Melt the chocolate and 2 tablespoons of butter together (you can use a microwave in 30-second bursts). Let it cool slightly so it doesn't melt the middle layer, then pour it over the top.
4.The Final Chill: Let the bars sit in the fridge for at least 2 hours before slicing.
🍰 Tips & Mistakes to Avoid
• The Slicing Hack: To get those perfect, clean lines you see in bakeries, use a hot knife. Dip your knife in hot water and wipe it dry between every single cut.
• Don't Rush the Layers: If the middle layer is too warm when you add the chocolate, they will mix together and look messy. Patience is key!
• Graham Crumb Substitute: If you can't find graham crackers, digestive biscuits work just as well and are usually very cheap.
🍰 FAQ
Q1.Do I really need custard powder?
It gives the classic yellow color and specific taste. However, if you're on a budget, vanilla instant pudding mix is a fantastic "secret" substitute.
Q2.How do I store them?
Always keep them in the fridge! Because of the high butter content, they can get quite soft at room temperature.
🍰 Summary
Nanaimo Bars are a masterclass in textures—crunchy, creamy, and snappy chocolate. They are the pride of British Columbia and will be the star of any dessert table.

🥧 Recipe 2: Classic Gooey Butter Tarts
🍰 About this Recipe
If Canada had a national dessert "rivalry," it would be about what belongs in a Butter Tart. Some say raisins, some say pecans, and some (the purists) say absolutely nothing but the goo! These tarts date back to the early 1900s in Ontario. They are essentially small pastry shells filled with a mixture of butter, sugar, and egg that creates a crunchy "crust" on top and a lava-like center.
🍰 Ingredients & Measurements
For the Shells:
• 1 and a half cups of all-purpose flour
• Half a teaspoon of salt
• Half a cup of cold lard or vegetable shortening (cheaper and flakier than butter for crusts)
• 4 tablespoons of ice-cold water
For the Filling:
• Quarter cup of softened butter
• Half a cup of packed brown sugar
• Half a cup of corn syrup (light or dark)
• 1 large egg
• 1 teaspoon of vanilla extract
• A pinch of salt
🍰 Step-by-Step Instructions
1.The Pastry: Mix flour and salt. Cut in the cold lard until it looks like small peas. Add water one tablespoon at a time until the dough sticks. Roll it out, cut circles, and fit them into a muffin tin. Chill the tin while making the filling.
2.The Goo: In a bowl, whisk together the butter, brown sugar, corn syrup, egg, vanilla, and salt until smooth. Don't over-whisk; you don't want too many air bubbles.
3.The Fill: Pour the mixture into the chilled pastry shells, filling them about two-thirds full.
4.The Bake: Bake at 375°F ( 190°C ) for 15-20 minutes. You want the pastry to be golden and the filling to be bubbling but still a bit "jiggly" in the center.
5.The Cooling: Let them cool completely in the tin before trying to remove them, or the gooey centers might collapse!
🍰 Tips & Mistakes to Avoid
• Cold is Gold: Keep your pastry dough as cold as possible. This is what creates those flaky layers.
• Don't Overfill: These tarts bubble up a lot in the oven. If you fill them to the top, they will spill over and stick to your pan forever!
• The "Runny" Factor: If you like them extra runny, take them out a minute early. If you like them firm, leave them in until the edges of the filling look set.
🍰 FAQ
Q1.Can I use store-bought shells?
Absolutely! If you're short on time or find a good sale, pre-made tart shells work perfectly.
Q2.Raisins or no raisins?
In Canada, this is a heated debate! If you want to add them, just put 5-6 raisins at the bottom of each shell before pouring in the liquid.
🍰 Summary
Butter Tarts are the ultimate Canadian comfort food. They are sweet, slightly salty, and incredibly satisfying. One is never enough!
🥨 Recipe 3: Homemade "BeaverTails" Fry Bread
🍰 About this Recipe
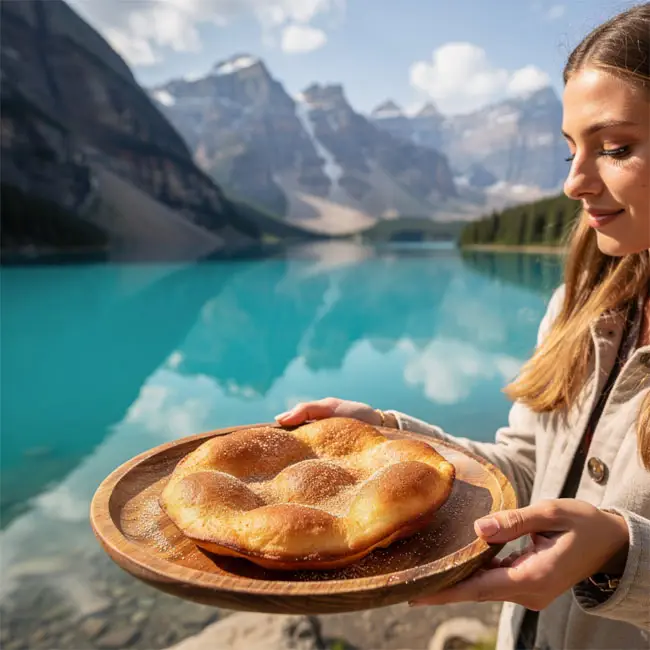
If you've ever visited Ottawa or a Canadian ski resort, you've seen people walking around with giant, flat pieces of fried dough shaped like a beaver's tail. "BeaverTails" is actually a brand name, but the style of bread is a long-standing Canadian tradition. It’s basically a flattened donut, fried until golden and coated in cinnamon sugar. It’s the ultimate "fair food" that you can make at home for a fraction of the price of a ticket to the festival!
🍰 Ingredients & Measurements
• 2 cups of all-purpose flour
• 1 teaspoon of instant yeast
• Half a cup of warm milk (not hot!)
• 2 tablespoons of granulated sugar (for the dough)
• Half a teaspoon of salt
• 2 tablespoons of melted butter
• Oil for frying (vegetable or canola)
• Topping: Half a cup of sugar mixed with 1 tablespoon of cinnamon
🍰 Step-by-Step Instructions
1.The Dough: Mix the warm milk, sugar, and yeast. Let it sit for 5 minutes until foamy. Stir in the melted butter, salt, and flour.
2.The Rise: Knead the dough for about 5 minutes until smooth. Place in a greased bowl, cover, and let it rise in a warm spot for about 45 minutes until doubled in size.
3.The Shape: Punch the dough down and divide into 6-8 pieces. Roll each piece into an oval shape (like a beaver's tail!) about a quarter-inch thick.
4.The Fry: Heat about 2 inches of oil in a heavy pan to 350 degrees Fahrenheit / 176 degrees Celsius. Carefully drop the dough in. Fry for about 1 minute per side until golden brown and puffy.
5.The Coating: Immediately toss the hot bread into your cinnamon-sugar mixture. Coat both sides thoroughly.
🍰 Tips & Mistakes to Avoid
• The Stretch: Don't worry if they aren't perfect ovals. The rustic, irregular shape is part of the charm!
• Oil Temp: If the oil isn't hot enough, the dough will soak up the grease and become heavy. Use a small piece of bread to test—it should sizzle immediately.
• Drain First: Give the bread a 5-second rest on a paper towel before hitting the sugar so the sugar sticks without getting clumpy.
🍰 FAQ
Q1.Can I add other toppings?
Yes! While cinnamon sugar is the classic, many Canadians love a squeeze of lemon juice, some Nutella, or even sliced bananas on top.
Q2.Can I make the dough ahead of time?
You can make the dough and let it rise in the fridge overnight. Just let it come to room temperature before frying.
🍰 Summary
This fry bread is warm, crunchy, and smells like a Canadian winter festival. It’s a fun, interactive dessert that kids and adults will both go crazy for.
🍩 Final Thoughts
Who knew that for just a few dollars, you could bring the best of Canadian bakeries into your own home? Whether you started with the chilled layers of the Nanaimo Bars, moved on to the gooey richness of Butter Tarts, or finished with a warm, sugary piece of Fry Bread, you’ve now mastered the "Big Three" of Canadian desserts.
The best part about these recipes isn't just the taste—it's the simplicity. These are desserts meant to be shared, whether it’s at a family dinner, a birthday party, or just a Tuesday night treat. They prove that you don't need fancy ingredients or a high-end kitchen to create something world-class.
I really encourage you to try these one by one. Start with the one that sounds most delicious to you, and don't be afraid to put your own spin on them! Cooking is an adventure, and these Canadian classics are the perfect map to get you started. If you make them, be sure to share them with friends—they’re too good to keep to yourself! Happy baking, and enjoy your little taste of Canada!
| 🇨🇦 🍨 < Back |